Application Server
Installation Guide:
The Internet BookShop
This document has been designed to guide you through the server installation of The Internet Bookshop Web Server.
Step I:
Setup the Web Server
Download the Database Web Server Software Installation Guide from our website and follow its instructions carefully to setup the IBM DB2 and Apache Tomcat software.
Step II: Create the Database
Under the Start Menu, go to:
Start Menu à
Program Files à
IBM DB2 à Control Center
Create a new database called bookshop using the Database Creation Wizard. For more information on how to accomplish this, see the Database Web Server Manual, Step 2 of Section I.
Step III: Prepare the Database
Under the Start Menu, go to:
Start Menu à
Program Files à
IBM DB2 à Command Line Processor
Connect to the database bookshop using your username and password. For more information, consult the Database Web Server Manual, Step 2 of Section II.
Once connected, you will need to create the tables for the database. Open up this project’s design document and turn to the last section where it lists SQL commands. Enter each of these commands into the Command Line Processor, to create each of the four tables for this database. Note that you will have to retype each statement as a single continuous line.
Step IV: Setup the Application Server
Assuming you are using the default Tomcat file location path,
C:\Tomcat\webapps\ROOT
Create two folders bookshop and classes at:
C:\Tomcat\webapps\ROOT\bookshop
C:\Tomcat\webapps\ROOT\WEB-INF\classes
Download the file bookshop.zip and unzip its contents into the first directory. Then, download the file bookshop-classes.zip and unzip its contents into the second directory.
You now need to modify each of the JSP files to accept your new location and database server as home. To do this, open each file and look for the line:
Connection con = DriverManager.getConnection("jdbc:db2:bookshop","user","pass")
You must change the user and pass values to match whatever username and password you have set for your database server. Such a password was often created when you installed the DB2 software or when you created the bookshop database. Also, you must keep the double quotes around the username and password.
If you downloaded version A with only JSP files, then you are done. If you downloaded version B, which contains JSP files servlets, then you need to complete the following steps to setup your web server:
You need to set the variable BookShopHomeLocation in the files:
C:\Tomcat\webapps\ROOT\bookshop\menu.js
C:\Tomcat\webapps\ROOT\WEB-INF\classes\BookHome.java
to match the location of your bookshop files on your server. It can be either a completely absolute address, in which you give the IP address, or a root-oriented address, in which you give the location relative to the root path. For example, if you put the files in the root directory than you can set this variable to be empty in order to get it to read from the root folder. If you placed the files where we recommended, then you need to change it to be “/bookshop”. It is currently set to this value by default.
In addition, you must recompile the file BookHome.java using javac.exe from the Java Developer’s kit after changing the value of the variable in this file. You must also make sure to restart the server after doing this, since the server does not always detect changes in servlets immediately.
Step V:
Test the Connection
Next, start your Tomcat server up by opening your Start Menu and selecting:
Start Menu à Program Files à Apache Tomcat 4.0 à Start Tomcat
If the server is all ready running, then you need to restart it before proceeding. If you have kept the directory locations as default and used the ones we have suggested, you should see the BookShop server at:
http://localhost/bookshop/index.html
To access the server from another computer, replace localhost in the URL with the IP address of whatever computer the server is running on.
Here is an example of what you should see:
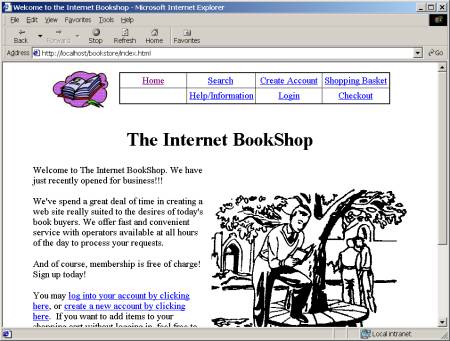
Test out all the different pages of the server. There should be no books in the database, since you have not added any yet, but you should be able to view all the pages without any server or database errors.
Step VI: Add Data to the Database
Now that both your database and application are working, you need to go back and add data to the database since the server starts out with no books available.
In this instance, we have provided an additional web page to assist you with this process. Simply go to:
http://localhost/bookstore/newbook.jsp
and add
individual books. Note that the ISBN
must be 10 digits long and must be all numbers. Keep in mind that this page does not have any security, so that
anyone who knows the link can access it.
You may want to eventually delete or remove this specific JSP in the
event that you do not want anyone to be able tamper with the list of books in
the database.