Main Character Isolation
After obtaining the foreground, we isolate the main character. The Bounding box video illustrates the output of this process. In this project, we assume there is a single main character; it is an open venue to explore extensions to handle multiple characters.
Major axis finding from histograms
We construct x- and y-histograms from the binary mask. A histogram is a plot of the distribution of foreground pixels against columns (x-) or rows (y-).
The major vertical axis is defined as the most populated column in the x-histogram. Initially we used Hough transform to obtain a true general major axis of the character. But as can be seen from Figure 4, there is substantial audience motion in the foreground. This often causes a horizontal line through the audience to be identified as the major axis, so we settled for the simpler major vertical axis method.
|
|
|
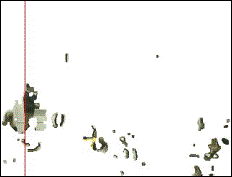

Figure 1 Finding major vertical axis.
Audience filtering Using Spatial Information
Initially, part of the audience was filtered out from the bottom upwards to the first local maximum in the Y-histogram. The noise effect was still severe however. Under the assumption that the main character moves in a confined space, we filter out the bottom third of the audience. This is reasonable under the static long shot camera setting, but we acknowledge it is not a general approach.
Singling Out Main Character
A connected component analysis is then applied along the major vertical axis. The main character is identified as the largest connected component in the binary mask of the image and calculate its initial bounding box. This is illustrated in the left image in Fig 6.
Audience Filtering Using Temporal Information
At times, an audience motion such as moving heads still disturbs the main character isolation. Temporal information is used to resolve the issue: we monitor for drastic bounding box dimension change from one frame to the next, and use bounding box dimension history data in such cases.
Shadow Elimination
|
Before Shadow Elimination |
After initial Shadow Elimination |
Shadow Elimination + noise reduction |
|
|
|
|


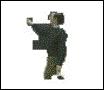
Figure 2 Shadow Elimination (enlarged to show detail)
Due to shadow and illumination, the character is usually not completely isolated during the aforementioned process. This poses a problem in the later stages of the gesture matching process. In the example video, the lecturer often casts a light gray shadow on the chalkboard. The shadow effect can be seen in Fig 6.
Our original idea is based on the assumption that the character’s clothing will be a different color than the shadow. We train a clothing color classifier on each row in the image around the major vertical axis, then move outward to each side and start to etch away pixels that register a significant color difference. This works well for this sequence of video, but it fails on highly textured characters.
A twist on the above idea gives rise to a more general approach. Compared to the character’s clothing, shadow color is less textured and more similar to the nearby background color. This is often the case under multiple light sources in an in-door setting. For each row of pixels, we start from the major vertical axis, and go outwards to find the left and right foreground edges in the binary mask. A nearby background classifier is trained using background pixels near the edges. The detector then progresses inward from the edge points to etch away shadow pixels, by comparing the so-called foreground pixels with the background classifier. The background classifier is updated as it progresses, and it stops when it has detected significant difference between the foreground and the nearby background. In the case where the background is similar to the foreground, it would have etched away too many foreground pixels, which leads to a foreground recovery routine. In Fig 7, the recovery effect is visible where the dark sweater is similar to the blackboard color. The shadow elimination approach may fail to etch away the shadow in this case. As our data is often noisy, as illustrated by a rim of an audience head in the left image in the figure below, we take measures against noise. As it moves towards the center etching away shadow pixels, it does not stop at the first substantially different colored pixel. It stops when it has seen a few outliers to be sure that the true foreground has been reached. This seemingly insignificant step makes a big difference in the result. We also employ optimizations to speed up the process. Assuming the light source is from above, shadow detection is performed from bottom up and stopped when there has been no shadow pixels etched away in a few previous rows.
The result of this process is illustrated in the middle image in Fig 7. Another noise reduction using Expand and Shrink [Jain] comes in play; the end result is the right image in Fig 7.
|
Template |
|
|
|
|
|
(frame448) SD=30 |
Match |
|
|
|
|
(frame1503) SD=141 |
No Match |
|
|
|
|
(frame 770) SD= 32 |
False Match |
|
|
|


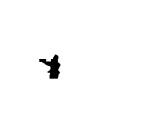

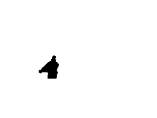


Figure 8 Top curve matching example frames