As you've already seen, you can choose to link the X axes of two views if you create them at the same time. However, you may want to link views that you create a different times, or link things other than the X axes.
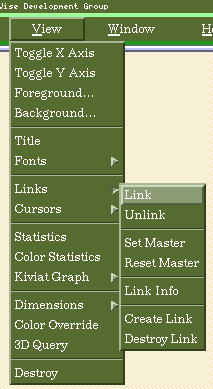
First, select one of the views you want to link. Then, select 'Link' from the 'Links' pull-right menu of the 'View' menu:

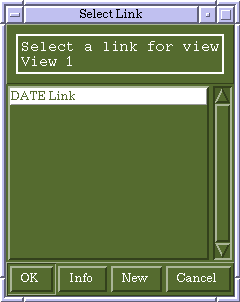
If you already have some existing links, you will see the 'Select Link' window:

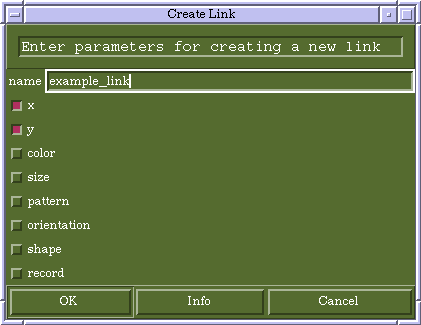
Click on 'New' to go to the 'Create Link' window (if you don't have any links, you will see this window right away):

For this example, we have selected to link the X and Y axes. The most commonly-used types of links are X/Y links and record links. These two types of links work somewhat differently. For X and Y links, all views linked to a given link share the same X and/or Y axis ranges. For record links, there is a master view and one or more slave views. Only those records shown in the master view can be shown in the slave view(s).
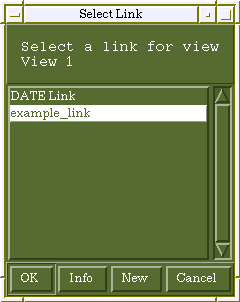
Once you have the link information filled in, click 'OK'. You will then see the 'Select Link' window again, with the new link shown:

Click on the new link and click 'OK'.
Now, select the other view that you want to link, and once again select 'Link' from the 'Links' menu. When you see the 'Select Link' window, click on the link you just created, and click 'OK'.
If your link is a record link, you must designate one of the linked views as the master view. To do so, select that view, then select 'Set Master' from the 'Links' menu:

The 'Select Links' window will again be shown, but only links that are record links will be shown in it. Click on the link for which you want to set the master view, and then click 'OK'.
Your two views are now linked. You can add more views to the link if you want to, by repeating the same procedure you followed for the second view.