|
My UW
|
UW Search
Computer Science Home Page
> ~dusseau
A. Arpaci-Dusseau Home
CS 202 Home
Schedule
Assignments
Related Links
C.S. Dept.
Home Page
|
 |


|
|
CS 202 Spring 2010: Project 2
Programming Project 2 : Due Friday March 26 (before class) - NO LATE PROJECTS ACCEPTED
The goal of this project is to create a points-based game. The game
can be either educational or action oriented. Have fun!
Your game is expected to be interactive; that is, the actions
of the user (e.g., clicking the mouse or typing characters)
will change how the game behaves. How the user interacts with the
game is completely up to you!
Be sure to read this entire page before proceeding. Even if you think
you are not interested in a particular game, we still recommend
that you look at all of the implementation hints because many of the
techniques may still be useful. This project also has a number of
strict requirements that you must fulfill!
Within our specification, you are welcome to create any game you like. You are encouraged to
use inspiration from projects on the Scratch website or other games
you like to play. Please avoid any
offensive material. We recommend looking at
the following for both inspiration and implementation hints:
-

Object Avoidance Games.
An example of straight-forward game is
one in which the user controls the main character (e.g., a monkey) with the arrow
keys. The user is expected to catch some good objects (e.g., bananas)
while avoiding bad objects (e.g., red bananas and the monkey theif).
The monkey gets points for every banana it grabs and loses points if
the thief runs into them. To determine when a Sprite has
reached the edge of the Stage (e.g., the falling bananas), you will
find the question blocks under the Sensing Menu useful.
Sample
code is
available.
-
Pen Based Games
I love the game "Bug on a Plate". The user
moves the bug using the arrow keys. The user gets a point everytime
they pick up a piece of fruit, but they lose if they run into their
previous trail (marked with the pen). A complete version of this is
included as part of the Sample Projects in the Scratch distribution;
a simplified version of the code is available here
-
Math Drills.
You may want to create a game in which the
user answers different math facts. Rather than simply
type in the answer, the user might have to select different moving
answers (e.g., by clicking objects with the mouse. We suggest reviewing the code for the two examples we
showed earlier in the semester:
Identify
and Counting.
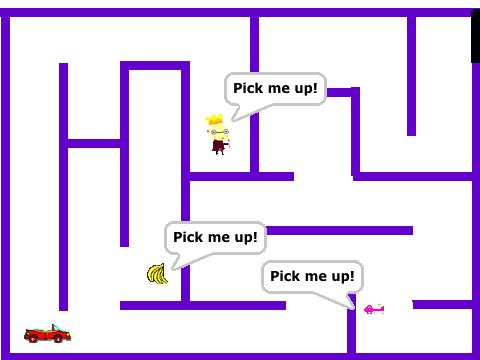
Maze-Based Adventure Games
You may want the user to navigate through a maze, gathering objects
for points. The code to ensure that a Sprite cannot move through
walls can be a little tricky; we recommend outlining the object with a
unique color on each edge of its costume and ensuring that the
corresponding color is not touching a wall in the corresponding
direction. See the sample for details.
You may want the user to be able to shoot bad objects. The code to
shoot is not too difficult. For example, the user could click the
mouse to pick a target; you'll want to make a Sprite associated with
the bullets, point the bullet in the direction of the mouse click and
keep moving in that direction for some number of steps. For an
example of how to move through a maze and even shoot, look at the code
for Level 2 of this
Adventure-Style
game.
-

Typing.
This game could teach typing: how fast can the
user repeat a single keystroke, a word, a random string, or a
sentence? To make this activity more like a game, you can make the
word to be typed move across the screen; the user must type the word
before it reaches the bottom of the Stage.
Multiple Choice Quiz. You may want to create a program to
quiz the user about various facts. For example, you could ask the
user to translate words from one language to another, the dates
different historical events occurred, geography questions, spelling,
vocabulary, sports trivia, or to identify (pictures of) famous people or objects.
Your program could display a (random) question to the user and ask
them to select the correct answer from 3 or 4 given possibilities.
The user could make their selection either by typing or clicking on
objects.
Implementation Hints: You will probably use multiple Lists for this
project; for example, you will probably want one list for all of the
questions. How you handle the lists of answers will vary.
If you
want to display random wrong possibilities along with the correct
answer for the user to choose between, you might want a single list of
answers; your code will then pick some random elements to display in addition to
the correct answer. Of course, you will need to randomize which
choice is the correct answer!
If you want to control which wrong answers are given, you will
probably have multiple answer lists. You could either have one answer
list per question (e.g., if the question has 4 possible answer
choices, each answer list will have 4 elements) or you could have 4 total answer lists (e.g., the
4 possible answers to the first question are element 1 of each
of the 4 lists, the 4 possible answers to the second questions are
element 2 of each list, and so forth). Again, either approach
should work.
You may want the answer possibilities to be
either strings (which different Sprites could "say") or pictures (which
different Sprites could change to as a costume; note that you can tell
a Sprite to change to a specific costume NUMBER).
Remember that you can create the Lists one time and the Lists
will keep their same contents from run to run of the game; you don't
need to set up the elements of the List each time, if you don't change
them.
- Anything else that sounds interesting. You are not
required to follow any of our suggestions given above. You can
implement any game that has points and follows the specifications
given below.
We expect that you will put many hours of thought and work into this
project. Do not wait until the last minute to start implementing your
project! Code written in a rush rarely works the way you hope it
might! If you start your project promptly, it will be much easier to
get help and advice from the Instructor and TA.
Specification
There are a few requirements that your game must fulfill. Many other
aspects as optional (like whether or not you have music playing in the
background or other sound effects).
- Points: The game must track the number of points the user has achieved in
this run of the game. The number of points should be tracked with
a Variable and displayed to the user.
- Instructions: The game must have instructions for the user. The instructions
can be simple and always showing on the Stage or more complex and
require the user click on a box or type a letter to see the
instructions.
- Assessment: At the end of the game, you must give a different message to the
user depending upon how many points they obtained. For example, you
could classify the user as (Beginner, Intermediate, or Advanced)
depending on if the acquired 0-5, 6-10, or 11 or more points. Of
course, your categories will be different (and hopefully more interesting!)
- High Score List: When the game is over, a sorted list of the 10 High
Scores must be displayed. You should tell the user if they achieved
a new high score and make sure their new score is inserted into the
correct location. These high scores should be kept in a list. Note
that you will not want to initialize the list when the game starts;
if the user saves the Scratch file when done playing, the new
contents of the list (and their high scores) will remain.
- Multiple Levels: Your game must have at least three levels
of difficulty. Higher levels might involve more difficult questions,
make objects move more quickly, have less time, or have more objects
to avoid. The difficulty level should increase as the user makes
progress.
Implementation Hints: You will want to use a variable to track the level the user
is currently at. You should strive to make the code (i.e., the
instruction blocks in the scripts) as identical as possible for each
of the levels. You should try to use variables to capture what is
different about each level and to use the variables to make the code
act differently. For example, a variable could designate the amount
of time it takes for a Sprite to move across the Stage; you could set
this variable to a smaller amount for higher levels; you'll then use
this variable within the appropriate move blocks.
- Optional: Timing Adding a timer can make the make more fun and competitive. You
can either use the built-in timer in Scratch or make your own. To use
the built-in time, you will want to reset the timer when the user
starts; if you want the time to show continuously, you then will probably want to copy the timer value to another
Variable that you display; you can then stop performing the copy when
the game is over. To make your own timer, you will want a Variable
that you continuously increment in a forever loop after "waiting" some
amount. Either approach should be fine. This step is optional.
Implementation Hints
As always, you should strive to write code that is easy for others to
understand and easy for you to modify. This usually corresponds to
writing code in a compact manner and code that is identical across all
Sprites that are doing the same actions (with perhaps only
local variables and initialization code differing across similar
Sprites).
We recommend writing small amounts of code and immediately testing
that code to see that it works correctly before writing more code.
Get each step working correctly before you move on to the next step!
We anticipate that the code for implementing multiple levels will be
the most challenging for you. We recommend leaving that functionality
for last: get the other aspects of your game implemented and working
correctly before adding in multiple levels! And, always SAVE
working versions of your project before adding significantly new
functionality!
Documenting your Code
Part of your grade will be based on how well you document your code.
Code must be documented so that others can understand how it works.
You will find documenting your own code useful: it is very easy to
forget how code operates, even when you are the one who originally
designed it! Because documentation is so important, your project
grade will be partially based on the quality of your documentation.
Documenting the behavior of your code has three components:
- Use good naming. All of your Sprites (and their Costumes)
should have descriptive names. The name of a Sprite can be changed in
the text box above the Tabs for Scripts, Costumes, and Sounds.
All of your variables should have descriptive names. Variables which
are accessed across multiple different scripts or Sprites should be named with the
convention "First Letters Capitalized. Local variables which are not used
outside of one script should be in all "lowercase".
All of you messages (for broadcasts and receives) should have
descriptive names as well. For a message X, to help show which Sprite
sends it and which receives it, it can be useful to name the message
"Sender : X : Receiver" (where Sender and Receiver are the names of
those Sprites, respectively). As a short-cut, if a message is both
sent and received within a single Sprite, you can omit "Sender" and
"Receiver". If a message is sent by multiple Sprites (or received by
multiple Sprites), you don't have to list all Sprites; instead you can
just say "Many". For example, if Sprite1 sends the message "Game
Over" to multiple Sprites, you should name that message "Sprite1: Game
Over: Many".
- Write Comments. Each Script that changes the value of
Variables that are accessed in other scripts should describe its usage. The Comment should be connected to the
Script. The Comment should describe every Input Variable and the
assumptions that are made about those variables. The Comment should
describe every Output Variable and how they will be set and what
different values mean. (You don't need to make a comment for Scripts
that don't access global variables, unless you want to!.)
- Project Notes. Every Scratch project has Project Notes
associated with it. These notes should describe how one can use this
project (i.e., the basic rules for playing the game and how to
interact with the program). The note should also describe any known
bugs or problems. Project Notes can be written from the "File"
pull-down menu.
Developing your Code
As always, programming assignments and projects in this class should be done on
your own. You may ask other students in the class questions, but you
may not share code with anyone in the class. You may not
use existing code that you find elsewhere, including the Scratch
website. You may look at the behavior of existing Scratch projects for inspiration,
but you should develop all of your code as a completely new project
and not modify, re-mix, or build from any one else's code.
The Instructor and the TA are very happy to give you suggestions on
how to implement your
ideas. We won't necessarily give the answer, but we will try to guide
you to a reasonable implementation. If you have bugs in your code
(i.e., it isn't behaving like you expect), we are happy to take a look
and see if we can see the problem. But, again, don't wait until the last
minute to do your project if you are hoping for any advice!
Grading your Code
Your project grade will be based on the following components:
- Specification (25 points) How closely did you follow the
specification for the project? Did you implement all of the features
we asked you to?
- Creativity/Effort (20 points) Does it look like you put
effort into the project? Do the backgrounds, characters, and objects
have a logical and/or interesting theme?
- Documentation (20 points) Do you have good, descriptive names for sprites,
costumes, variables, and broadcasts? Did you write comments where appropriate
and use the project notes?
- Code Style (15 points) Do you use the correct programming
structures?
- Demo (20 points) Were you able to explain how your code
works to the TA in your demo? Did you show your project to the class?
Turning in your Project Code
There are two steps to turning in your Project 2 code.
First, you should upload your project Scratch file (ending with the extension
.sb) to your Learn@UW Project2 folder. If you have any problems
uploading your code, send us email right away! Confirm that your
project file actually shows up in your folder! We will use this
version to grade your project.
Second, please upload your project to the Scratch website and add it
to our Gallery named
Project 2 - 202Sp10. You can do
this by clicking on the "Share" button at the top of the Scratch
environment and then selecting "Share this Project Online". In a
pop-up menu, you will type in your username and password and then
click OK. This version is so that others can see what you have
created! You should then go to the Gallery
Project 2 -
202Sp10 on the Scratch web site. Once you are at the Gallery, you will see a button labelled "add my project" which
will allow you to add you project. Do this and feel free to browse
through other students' projects!
|
|
|