Method
For our project, we have divided the application into two parts:
- Face Filters
- Face Swapping
Face Filters
A few steps to our method occur before any code is run:
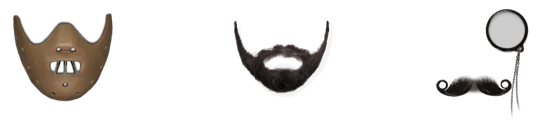
- We designed three different mask filters to apply to the input image faces. These masks were designed within Adobe Photoshop.
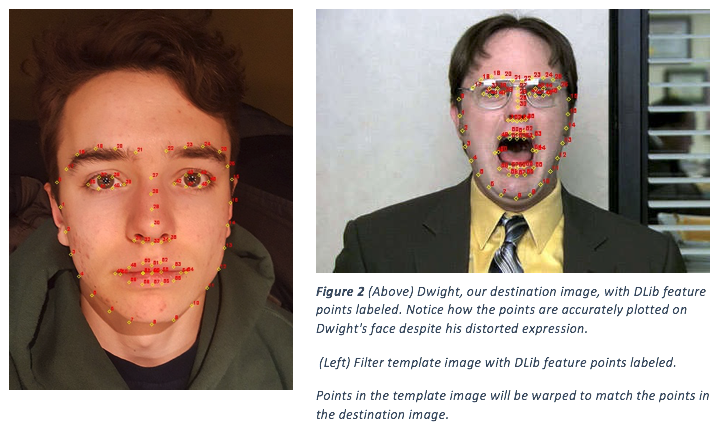
- Next we fit these masks to a “filter template image”. This template image should be a clear image of the front of a face. The template image is used to train our program how to accurately map a filter/mask onto any face we input. See Figure 1. Yes, fitting the mask to the template image does require some work up front but this manual step leads to far more accurate results.

Note: Designing quality filters goes a long way in achieving fast, realistic results. In Snapchat, one will notice that the filters never change in any way (colour, exposure, feathering, etc.) except to move with a face. A well designed filter up front minimizes the work needed to add realism later thus greatly reducing processing time. This is one reason Snapchat can seamlessly display 3d filters in real time --- every aspect of the filter is constant except for the 3d alignment.
Now into the program:
- OpenCV’s face-detection works on the Viola Jones Algorithm. This algorithm is one of the first object-detection frameworks, and OpenCV uses this as a way to detect faces in real time. Using this, the template face is quickly and accurately detected from the input image.
- DLib is used to detect the facial points in the same template image. These points are calculated using DLib’s various machine learning algorithms, which are able to identify 68 points in specific areas around the face such as the nose, eyes, brows etc. We store these points in an array that corresponds to this template image.
- Step 3 and 4 are repeated but for the destination image (image with face to have filter applied onto it). Figure 2 visualizes the output.
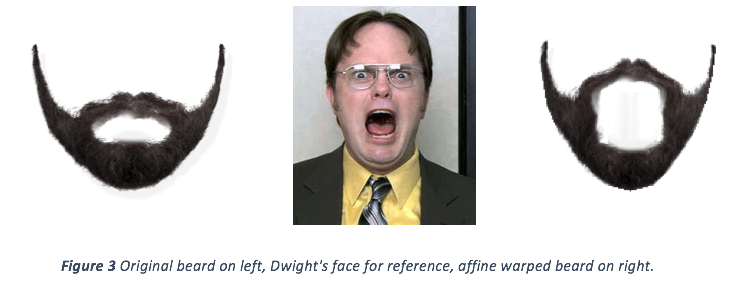
- Now we use Skimage, a package for Python, to complete an affine transformation that warps the 68 points in the source array to match the corresponding 68 points in the destination array. However, instead of warping our filter template image, we apply the affine warp to just our filter. See Figure 3.
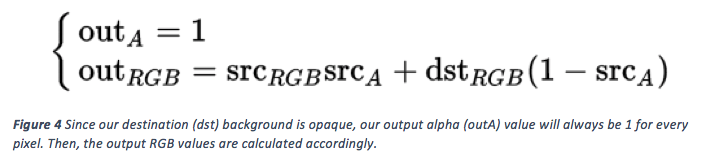
- Now that the filter is warped, we need to blend it on top of the destination images. Since each filter was exported as a TIF, our program reads them as having a blue, green, red, and alpha channel. We added an opaque alpha channel to our destination image in order to calculate the output RGB and alpha values for each pixel. Our calculations follow the bellow equations for alpha compositing.
Face Warping
- Our face swapping can be done completely by the program given the input of an image with a source face and a destination image or video.
- Initially the program takes the source face, and detects the face and feature points (as before).
- For each frame of video, the face and feature points are detected.
- In each frame, the source face is then affine warped to match the destination face in the video. Our method of affine warping creates convex hull around the 68 feature points of the source face. This hull is used to mask the key facial features out of the source image. This masked source image is warped onto the destination frame. See Figure 5.