Step 2: How to create a new project

Launch Create Edit Run Handin previous step next step

This step will show you how to create a Java application project in Eclipse.
  1. Choose File → New → Project from the Eclipse menu bar, as in the following example:
    New Project
    The New Project wizard will appear, as in the following example:
    New Project Wizard

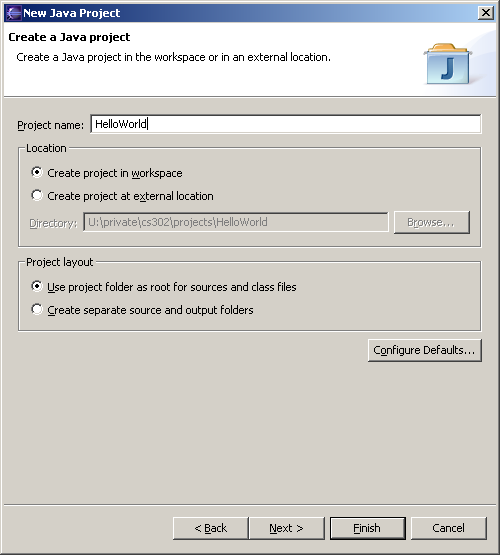
  2. Make sure "Java Project" is selected and click the Next button. The following window will be displayed:
    New Java Project
Wizard

  3. Click Finish to create the project. You will be presented with the following dialog box:
    Perspective Switch
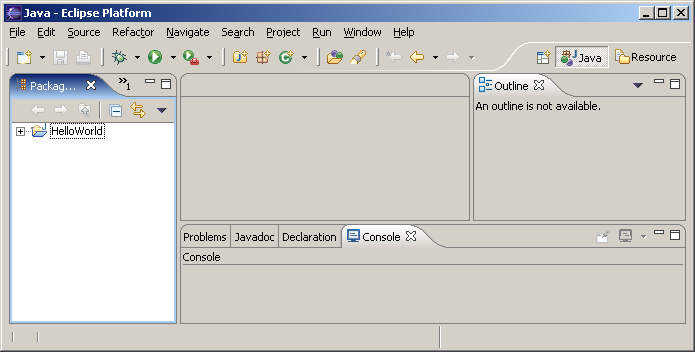
    Select "Remember my decision" (you will only be writing Java programs for this class) and click "Yes". The following screen will be displayed, denoting an empty workspace:
    Empty Workspace

  4. Congratulations, you have created your first Java project! But, we're only halfway there. Next comes putting some substance (code) into the project to make a working program!

    Leave this project window open, if you plan to continue with the tutorial at this time. Otherwise, you may exit Eclipse by clicking the  button in the upper right hand corner of the Eclipse title bar, or through the Eclipse menu File → Exit.


    Launch Create Edit Run Handin previous step next step

    Last modified January 10, 2005
    Original version created by Sue Hazlett
    Updated for Eclipse by Martin Hock