Step 4: How to build and run your project
This step will show you how to compile and run your Java program
in Eclipse. Be sure to read the whole document!
Before you begin, make sure the text in your editor window is
exactly the same as the text in the previous step.
- Go to the left Package Explorer pane. The HelloWorld
folder should be opened, but if it is not, click on the + symbol to the
left of it. Then, click on the + next to "(default package)" to
access the HelloWorld.java file. Right-click on the file and
select Run → Java Application, as in the following image:
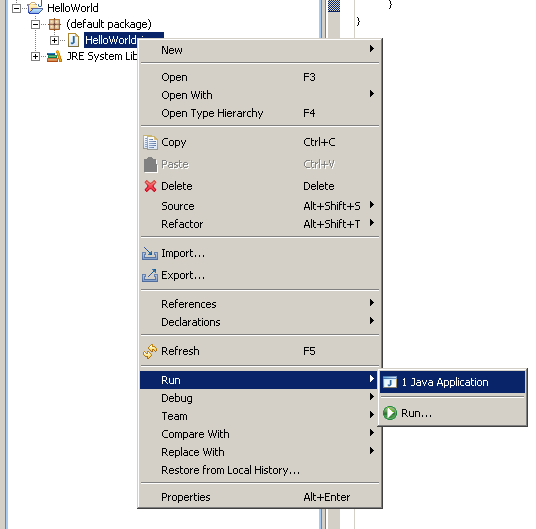
Note: If you do not see a "Java Application" option, there is an
error in your HelloWorld.java file. Don't click on the "Run"
option with the green arrow icon which is always available. Instead,
go back to Step 3 and fix your
HelloWorld.java file.
Once you run the HelloWorld program, you should notice
output in the Console pane:
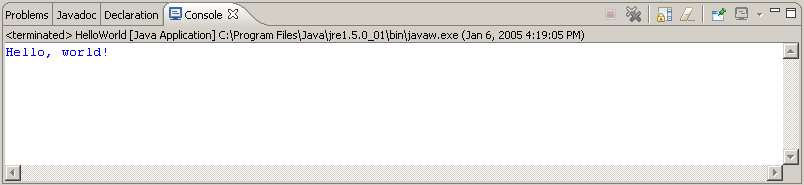
Note that you may have to click on the
tab labeled "Console" to see this output.
Now we will do one more project, which
demonstrates the adding of a jar file. If you are working in a group, make sure
to pass the keyboard to a different member of the group.
FortuneTeller
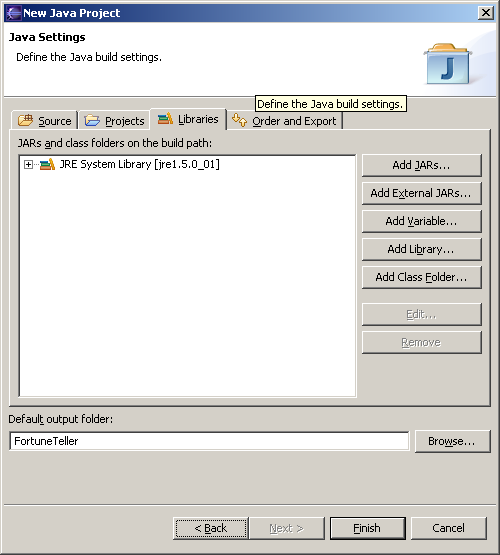
- Create a new project as you did in Step 2. Call it "FortuneTeller".
However, instead of clicking Finish immediately in part 2 of Step 2,
click the Next button. The following should be displayed:

- Click on the "Libraries" tab and the following should be
displayed:
- Click the "Add External JARs" button and type
w:\u\c\s\cs302\public\html\resources\EclipseTutorial\fortune.jar
You can copy and
paste this from the webpage. Then click Finish.
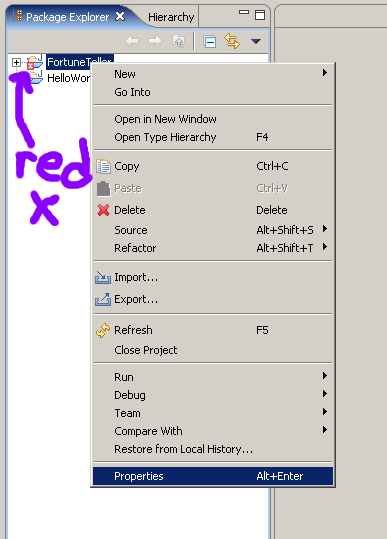
- If a red X appears on the FortuneTeller folder which is created,
this means that you have made an error in the entry of the above text.
Look closely at the folder as it can be hard to see. If this is the
case, follow the next two steps:
- Edit the link so that it is correct in the following way:
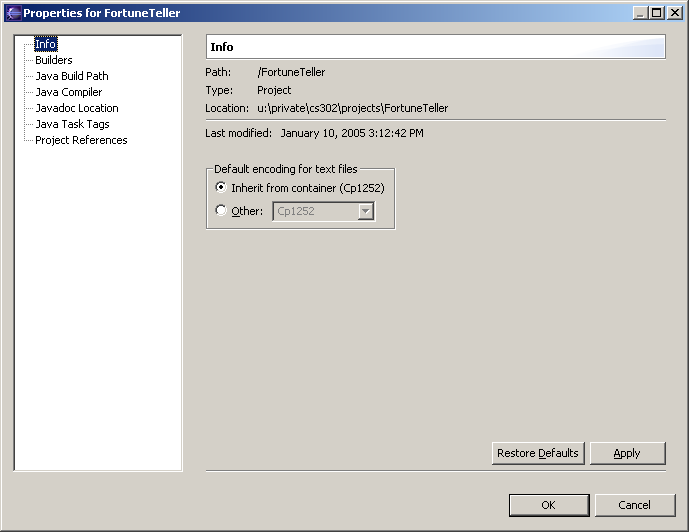
Right-click on the FortuneTeller folder in Package Explorer and
choose Properties:
The following window will appear:
- Click on the "Java Build Path" option on the left hand side,
resulting in the following window:
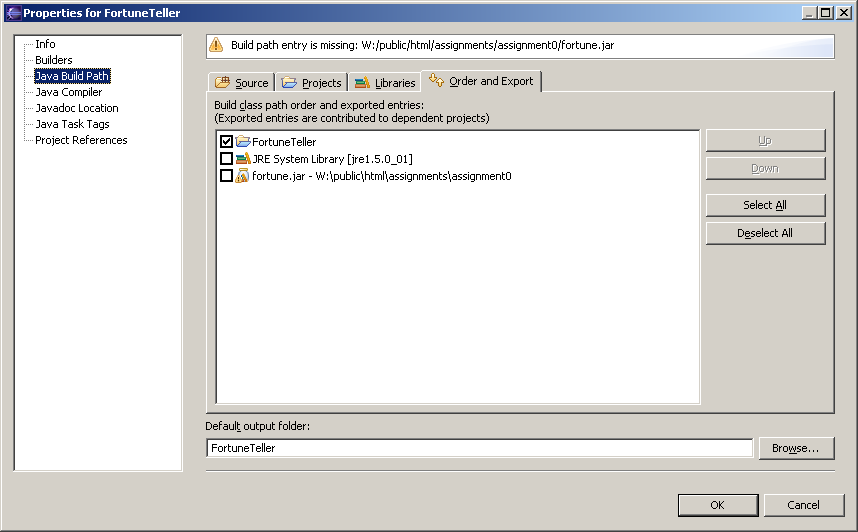
You should have an error message with a yellow
triangle, but the exact text for your message will differ.
- Click on the tab labeled "Libraries", resulting in the following
window:

- Select the picture of the jar with the exclamation point and click
the button labeled "Edit...", then try copying and pasting the above
text (reminder:
w:\u\c\s\cs302\public\html\resources\EclipseTutorial\fortune.jar)
and click OK.
- The exclamation point should disappear. If not, try clicking the
"Edit..." button and trying again. Don't proceed until the
exclamation point disappears. If it doesn't work after a few tries,
ask your instructor or a consultant for help.
- Click OK and the red X should disappear. If it did not, return to
step a. above or ask your instructor or a consultant for help.
- Now create a new file in the FortuneTeller project called
FortuneTeller.java, and edit it so that it looks like the
following:
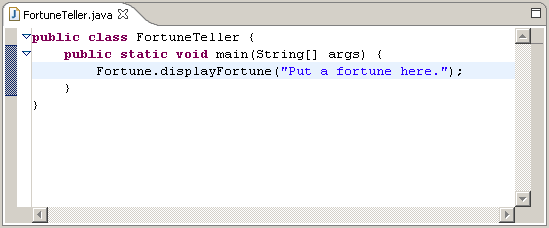
Edit the text in quotes to give a
fortune. Be nice! For now, keep the fortune all on
one line. Later, you'll learn how to work with longer pieces of text.
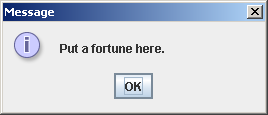
- Run the file as you did with HelloWorld (right-click and choose
Run) and the following dialog box should appear (with your text):
A last important note is that for most of your projects, you'll have
more than one file that you edit. You can add more than one file to a
given project the same way you added the first file to each project.
However, each project will produce only one program. The different
files will allow you to organize yourself in an object-oriented way.
Since we made two different little programs here, we made a project
for each one.
Last modified September 6, 2005
Original version created by Sue Hazlett
Updated for Eclipse by Martin Hock
Updated for lab section use by Beck Hasti