|
ModelSim Tutorial
Acknowledgement: This tutorial was originally created by Rami Dahman & Kyle May, CS/ECE 552 TAs, Spring 2020.
Links to specific parts of tutorial:
CS 552 ModelSim Setup Tutorial
This document will detail all of the steps required to properly use ModelSim on the CSL computers. We are assuming that you already have a CS account, so if this is not the case, please let us know.
These steps are from the Spring 2019 tutorial, found here.
The steps are as follows:
-
Install required software in order to ssh to CSL machines and enable X-forwarding.
-
Run configuration script.
-
Use ModelSim to run test code.
Software for SSH and X-forwarding
Windows Users:
-
[Install Xming] and run it (if you already have a preferred X server application, you can skip this step)
-
[Install PuTTY] (64-bit) and run it (if you already have a preferred SSH client, you can skip this step)
-
in the Session tab, set Host Name as best-linux.cs.wisc.edu, Port 22, and Connection type SSH
-
in the Connection > SSH > X11 tab, check the Enable X11 forwarding box, set the X display location to :0.0, and the X authority file to the path for your Xming installation (likely C:\Program Files (x86)\Xming\Xming.exe)
-
Click Open to start an SSH session, and login using your CS credentials.
Mac Users:
-
[Install XQuartz] and run it
-
In the terminal provided by XQuartz, run the following command:
$ ssh -XY [CS username]@best-linux.cs.wisc.edu
For Macs, from this point on, if you want to use the GUI for ModelSim, you will need to ssh into the CSL machine using the terminal application provided by XQuartz. Since this terminal is not pleasant looking, we recommed typically ssh'ing in with a native terminal and then only use XQuartz terminal when you need to launch a GUI.
Linux Users:
-
In a terminal, run the following command:
$ ssh -XY [CS username]@best-linux.cs.wisc.edu
If you have any trouble setting up your SSH client, go to this prior tutorial by Professor Sankaralingam for help.
If you have any trouble with X-forwarding, go to this website for help.
Run configuration script
The following configuration script will setup environment variables in order for you to have access to ModelSim. Please look at this script (located at /u/s/i/sinclair/public/html/courses/cs552/spring2020/handouts/tutorial/config.sh) briefly, then run the following commands (NOTE: /path/to/config represents the path to your config.sh file, you should fill this in as appropriate for you).
		  $ chmod +x /path/to/config/config.sh # make this file executable


		  $ ./config/config.sh # Run configuration
Check log.out to make sure that there are no error messages.
Finally, run the following command to update your terminal with these changes (you only need to do this once):
$ source ~/.bashrc
Using ModelSim
-
Run
vsim &
-
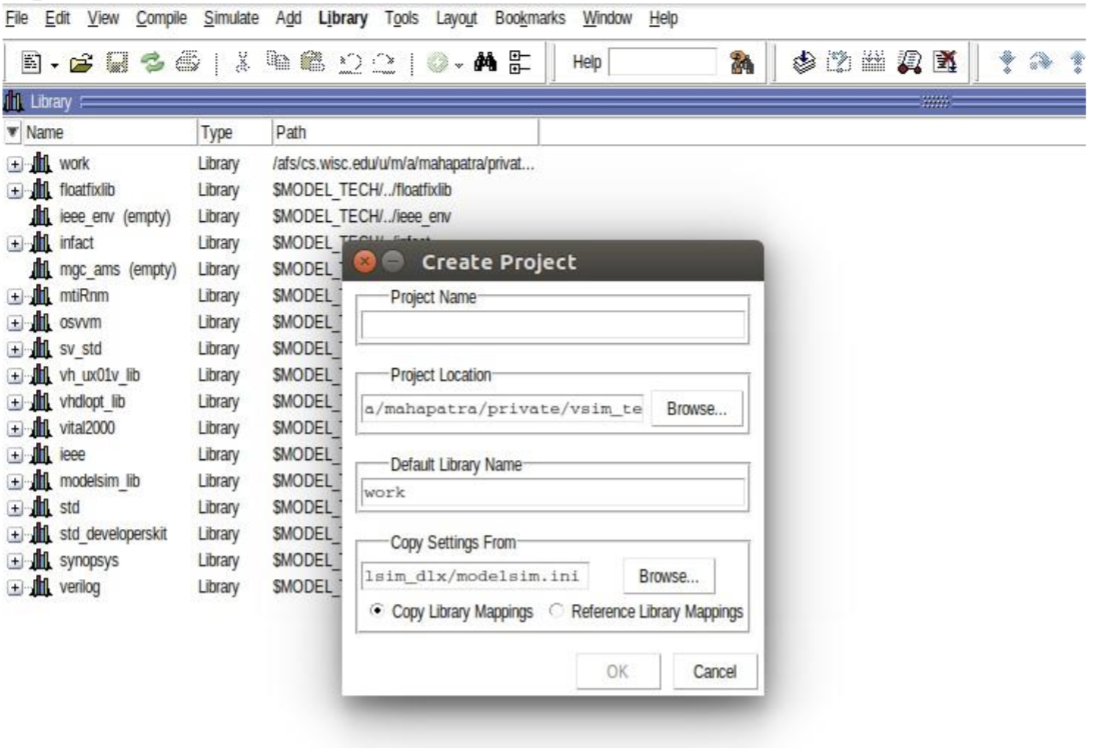
To run your simulation, you will need to create a project. Click on File -> New -> Project. You will see the window presented below.Choose a location for your new project andgive it the name. Leave the other settings to their default. This just says that all code will be compiled into the library "work".
-
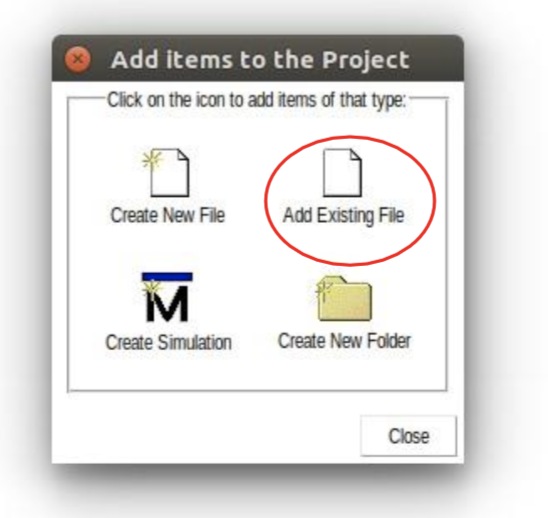
Click on Add Existing File as shown in the picture. Download test.v and test_tb.v from Canvas. Navigate to the location where you downloaded test.v and test_tb.v and add both of those to your project. Keep other settings at their default. Click OK when done.
-
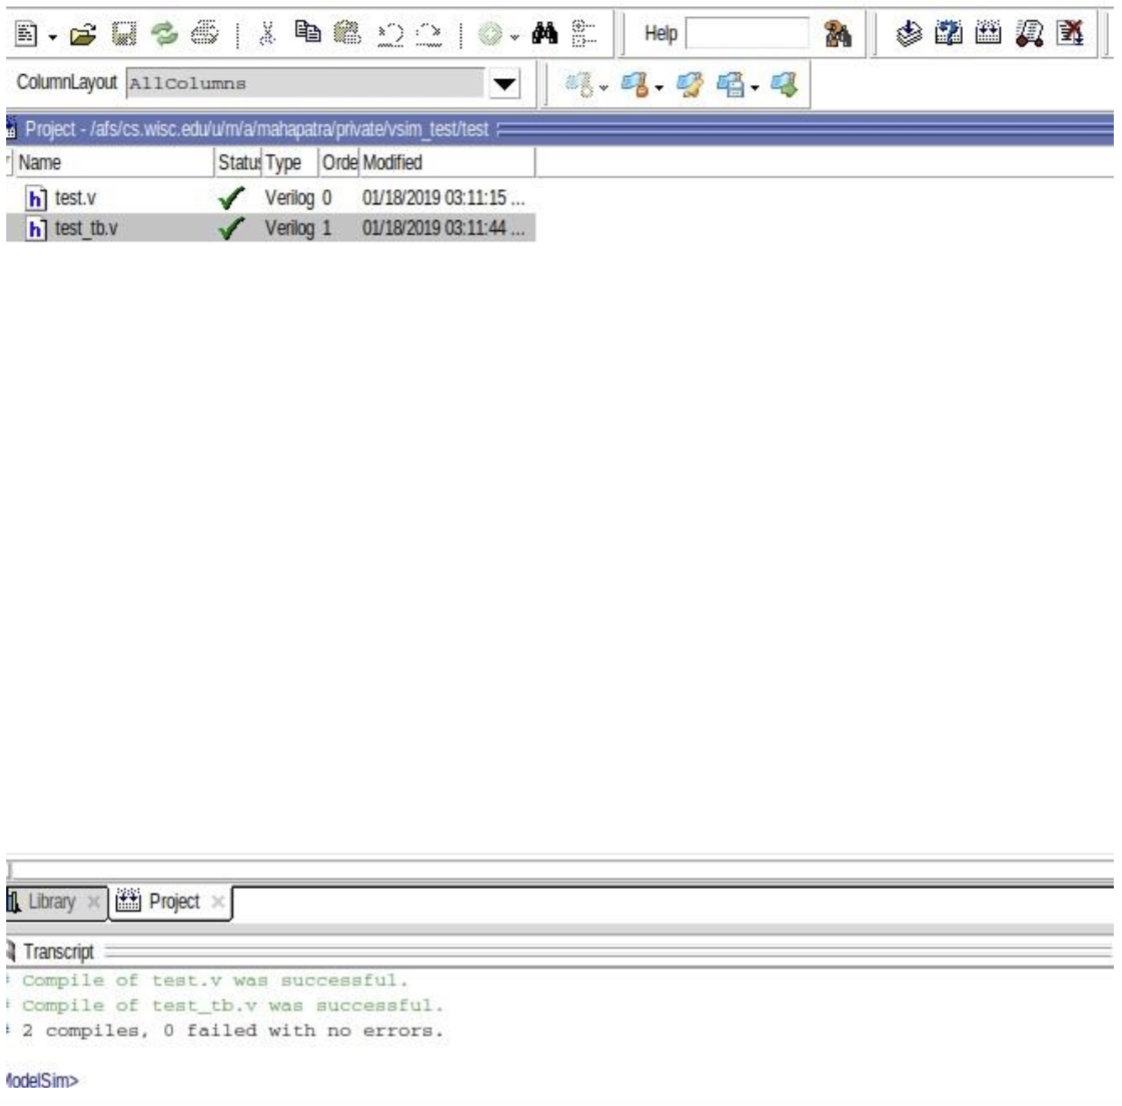
You will need to compile the source files first. To do this, right click on test.v, click on Compile, then click on Compile All. You should see messages in the Console window appear in green that the compile was successful.
-
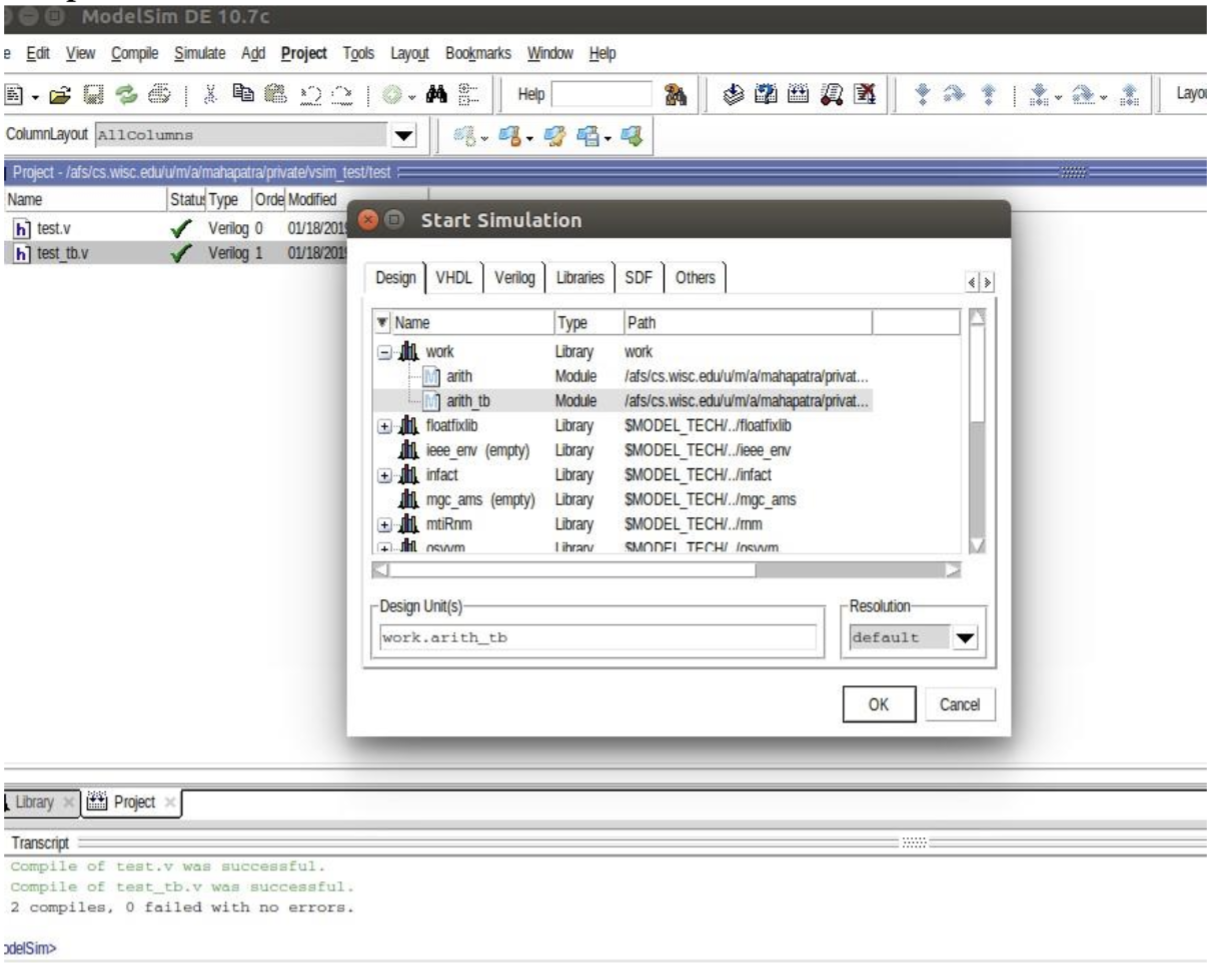
To start your simulation, click on Simulate in the Menu Bar, then click Start Simulation. This opens the Start Simulation Window. Click on the plus sign next to work, then click on the plus sign next to arith_tb. Make sure you select arith_tb and not arithas we want to simulate the design at the test bench level. Once arith_tb is highlighted, click OK.
-
Click on Simulate → Run → Run-All. You should see “MODELSIM SETUP SUCCESSFUL”

|